ECE Movement Curriculum · Trained Apparatus Programs

12 Vaulting Box Activities for Preschoolers: Floor Preparation, Support, and Landings

This illustrated Chapter 7 adaptation places vaulting-box work inside a professional early childhood apparatus program. Start with floor-level preparation, use only approved equipment and mats, and let a trained educator decide whether an individual child is ready for each progression.

ADVERTISEMENT

Quick Teacher Guide: Vaulting Box Work

Keep these four boundaries in mind before reviewing any of the 12 illustrated activities below:

Professional Scope

Use elevated apparatus only in a program-approved lesson led by a trained educator. This page is not a DIY construction guide or a substitute for apparatus training.

Floor-Level First

Rehearse walking, stepping over a soft bar, hand support, two-foot takeoff, and quiet landing on the floor before considering a box.

Equipment and Mats

Follow the equipment maker's instructions and program policy. Inspect the complete box, board, landing mat, approach lane, and walk-out before every turn.

Readiness and Choice

There is no universal age, height, or repetition target. A child may step down, return to a component skill, observe, or stop at any time.

Chapter 7 — Illustrated Activity Cards

12 Vaulting Box Activities and Preparations

The cards preserve the source sequence while separating floor-level preparation from professional apparatus progressions. Expand Teacher Notes for equipment scope, setup, safety, and lower-risk alternatives.

Activity 7-1: Soft-Bar Hurdle Step-Over

Soft-Bar Hurdle Step-Over

A trained educator holds a soft bar low while the child steps or makes a small jump over it, building a first look at the vaulting pathway.

Teacher Notes: Setup, Safety & Variations
Aim: Explore an approach, takeoff, and landing sequence without introducing a box yet.
Equipment: A purpose-made soft foam bar and clear floor lane; no vaulting box is needed for this entry activity.
Setup: The educator holds the soft bar in a stable, low position at the side of a clear lane. Children approach one at a time.
Steps: Walk the lane first, then invite a step-over or small two-foot jump. Finish with a balanced stop and walk back outside the lane.
Safety: Use only a soft bar that yields easily. The educator controls the cue and never swings the bar toward a child; the child may step over instead of jumping.
Make It Easier: Place the bar on the floor as a line to step across.
Make It Harder: Add a second floor marker for the landing stop, not a higher obstacle.
Teacher Cue: "Approach, step or jump, quiet landing, and walk around."
Activity 7-2: Box-Side Support: Long Legs

Box-Side Support: Long Legs

With an approved low vaulting box and a trained educator close by, the child places both hands on the sides and extends the legs back briefly before returning to the floor.

Teacher Notes: Setup, Safety & Variations
Aim: Feel supported weight through open hands while keeping the legs controlled and low.
Equipment: An approved, stable low vaulting box and landing mat used according to the manufacturer's and program's policy.
Setup: Set the box on a nonslip surface with the mat fitted securely. The trained educator stays beside the child and clears the approach and landing areas.
Steps: Walk to the box, place both hands on the side surfaces, lean into support, extend one or both legs back only as far as controlled, and step down.
Safety: This is apparatus work, not a home setup. Do not add height, stack loose mats, or allow the head or neck to contact the box. Stop if the child cannot follow the release cue.
Make It Easier: Practice hands-on support against a firm foam wedge or the floor with knees down.
Make It Harder: Hold the supported shape for one calm breath before stepping down; do not increase box height.
Teacher Cue: "Hands wide, eyes ahead, feet low, and step down when you are ready."
Activity 7-3: Box-Side Support: Step-Up

Box-Side Support: Step-Up

From a supported hand position at an approved low box, the child draws the feet underneath into a squat and steps onto the top with educator guidance.

Teacher Notes: Setup, Safety & Variations
Aim: Coordinate hands, hips, and feet during a controlled step-up.
Equipment: An approved low vaulting box, a secure landing mat, and a trained educator; use manufacturer-approved accessories only.
Setup: Place the box and mat so nothing can slide. Keep one child in the lane and the educator at the side where support is needed.
Steps: Set both hands, shift weight forward, bring the feet underneath one at a time or together as appropriate, stand tall on the top only if stable, and step down with help available.
Safety: Do not pull the child onto the box or let the child jump down unexpectedly. No loose height adjustments, running approach, or head-first entry is used.
Make It Easier: Use a floor-level foam block or place one knee on a low, stable surface before standing.
Make It Harder: Practice a controlled turn to face the educator before stepping down, only if the box remains stable and policy permits.
Teacher Cue: "Hands first, feet find the top, pause, then step down."
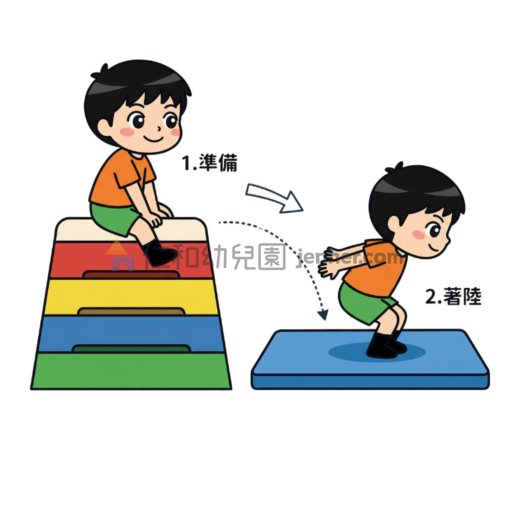
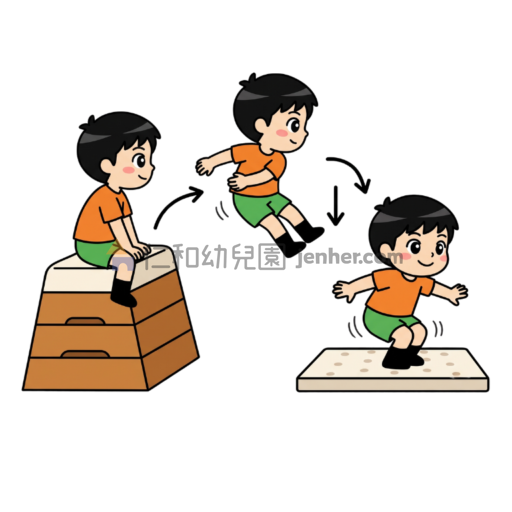
Activity 7-4: Box-Top Step-Down Landing

Box-Top Step-Down Landing

From the top of an approved low box, the child steps or makes a small forward jump to the landing mat and bends the knees to absorb the landing.

Teacher Notes: Setup, Safety & Variations
Aim: Practice seeing the landing area and finishing with a stable, bent-knee landing.
Equipment: An approved low vaulting box and a securely fitted landing mat, checked before use.
Setup: Position the landing mat directly in front of the box with a clear walk-out. The educator stands close at the side, not in the landing path.
Steps: Stand still, look toward the mat, step or make a small two-foot jump forward, land with knees soft, hold the finish, and walk away from the lane.
Safety: Use only the apparatus configuration approved by the program. No twisting, backward jumping, or added height; the child may step down at any time.
Make It Easier: Step down with one foot while holding the educator's hand for balance.
Make It Harder: Add a floor spot to freeze on after landing; keep the same apparatus height and distance.
Teacher Cue: "Look at the mat, land on two quiet feet, bend, and freeze."
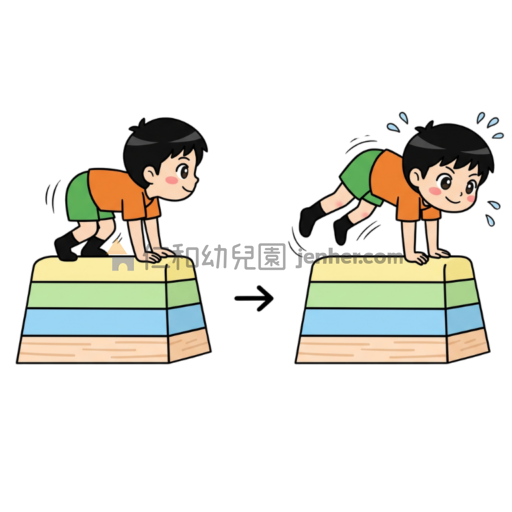
Activity 7-5: Hands-on Box Pop

Hands-on Box Pop

With both hands supported on the box, the child makes a tiny controlled pop of the hips while the feet remain close to the surface, then resets.

Teacher Notes: Setup, Safety & Variations
Aim: Explore a brief lift of the hips through supported hands without asking for a full vault.
Equipment: An approved stable low vaulting box and secure mat; a trained educator remains within reach.
Setup: Use the box at the program-approved configuration. The educator demonstrates beside the box and keeps the landing zone empty.
Steps: Place hands, bend the knees, press gently through the palms, lift the hips a little, return both feet, and step away.
Safety: Keep the movement small and controlled. Do not kick, jump over the box, load the neck, or encourage a child to repeat when tired.
Make It Easier: Practice shifting weight from feet to hands with both knees supported on a mat.
Make It Harder: Add a slow hand-placement-and-reset sequence, not a higher or longer hop.
Teacher Cue: "Press the box, lift a little, feet return, and reset."
Activity 7-6: Hands-First Box Crawl

Hands-First Box Crawl

The child sits or lies on the approved box and uses alternating arm pushes to move a short distance, staying low and supported.

Teacher Notes: Setup, Safety & Variations
Aim: Explore pushing through the arms while maintaining a low body position.
Equipment: An approved stable low box with a secure mat around it; no improvised furniture.
Setup: Use a short, clearly marked route and keep the educator beside the box. Remove nearby equipment and keep the floor dry.
Steps: Start seated or belly-down as shown, place hands securely, push forward in small alternating actions, pause, and return with educator help.
Safety: The educator checks the box before each turn. Do not let the child slide off head-first, pull on an edge, or continue after wrist or shoulder fatigue.
Make It Easier: Practice crawling on a mat with knees down and the box out of the route.
Make It Harder: Place a soft target at the end of the short route to touch before returning.
Teacher Cue: "Hands push, body stays low, pause, and come back safely."
Activity 7-7: Box Step-Down with Optional Turn

Box Step-Down with Optional Turn

A child who already lands straight with control may practice a small turn before stepping onto the mat, but the straight landing remains the default.

Teacher Notes: Setup, Safety & Variations
Aim: Notice orientation during a controlled step-down, only after the child has a reliable straight landing.
Equipment: An approved low vaulting box, fitted landing mat, and trained educator; no added height or loose landing surface.
Setup: Mark a clear landing direction and keep all other children outside the apparatus lane.
Steps: Rehearse the straight step-down first. If the educator confirms readiness and policy allows, turn a small amount before stepping or jumping to the mat and finish in balance.
Safety: Turning is not an entry requirement. Do not ask for a 90- or 180-degree rotation as a fixed goal, and do not progress when the child is fearful, tired, or unstable.
Make It Easier: Step down straight and turn after both feet are stable on the mat.
Make It Harder: Name the landing direction before the turn; keep the same low apparatus and a slow pace.
Teacher Cue: "Straight first. If your teacher says ready, turn small, find the mat, and freeze."
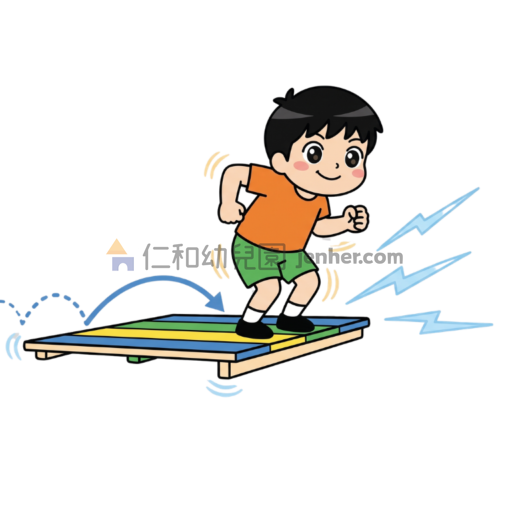
Activity 7-8: Two-Foot Springboard Press

Two-Foot Springboard Press

The child explores pressing both feet into an approved springboard and feeling its response, without adding a running vault or box jump.

Teacher Notes: Setup, Safety & Variations
Aim: Notice the timing and feel of a two-foot press without turning it into a speed challenge.
Equipment: A program-approved springboard or takeoff board, secured exactly as directed by its manufacturer, with an appropriate mat.
Setup: The educator controls access to the board. Children approach by walking, use one turn at a time, and exit away from the next child.
Steps: Walk to the board, place both feet as demonstrated, press gently, allow a small rebound or step, and return to the floor under control.
Safety: Never use a loose board, run onto it, or combine it with a box unless a trained program has approved the complete setup. Stop if the child loses balance.
Make It Easier: Practice two-foot jumps on a floor spot without the springboard.
Make It Harder: Repeat the same controlled press with a pause between turns; do not increase speed or apparatus height.
Teacher Cue: "Two feet together, gentle press, quiet return."
Activity 7-9: Low Box Pathway Practice

Low Box Pathway Practice

After the component skills are steady, a trained educator may connect a walk-in approach, two-foot board press, hand support, step-up, and controlled step-down on approved equipment.

Teacher Notes: Setup, Safety & Variations
Aim: Connect familiar movement pieces while keeping the child's pace and control more important than completion.
Equipment: A complete manufacturer-approved low vaulting setup: springboard if required, vaulting box, and fitted landing mat.
Setup: A trained educator checks the full setup, keeps one child in the approach lane, and leaves a clear walk-out after landing.
Steps: Walk the pathway, rehearse the landing, then add the approach only if the educator confirms readiness. Stop after one controlled attempt and reset the lane.
Safety: Do not copy a height or configuration from the illustration. Follow equipment instructions and program policy; a child who cannot follow the lane or landing cue returns to a component activity.
Make It Easier: Remove the approach and practice hand support plus a step-down at floor level.
Make It Harder: Ask the child to name the sequence before moving; do not add a higher box, faster run, or rotation.
Teacher Cue: "Walk the plan: approach, feet, hands, mat, freeze."
Activity 7-10: Low-to-Low Box Pathway

Low-to-Low Box Pathway

The source shows two boxes at different levels. Use a connected apparatus only when a trained educator and the program policy approve it; otherwise keep the activity as floor-level step stations.

Teacher Notes: Setup, Safety & Variations
Aim: Practice moving through a change of level while deciding where hands and feet go next.
Equipment: Only a stable, approved multi-box setup checked by a trained educator, with connected mats and manufacturer-approved spacing.
Setup: Keep each apparatus lane isolated. The educator confirms that neither box nor mat can shift before the child enters.
Steps: Begin with separate floor markers. If the full setup is approved, step onto the lower surface, pause, move to the next surface, and finish with a controlled mat landing.
Safety: Do not stack, bridge, or raise boxes at home. Never ask a child to leap from one box to another; use a step or the exact supervised sequence approved by the program.
Make It Easier: Use hoops or foam floor blocks as level markers instead of elevated boxes.
Make It Harder: Add a verbal stop at each station; keep the route slow and the apparatus unchanged.
Teacher Cue: "One station at a time—look, place, pause, and move on the teacher's cue."
Activity 7-11: Sideways Box Straddle

Sideways Box Straddle

The illustration shows a sideways box and a straddle-style vault. Reserve this advanced pattern for a trained educator's program-approved lesson after straight step-downs are consistent.

Teacher Notes: Setup, Safety & Variations
Aim: Explore a supervised hand-support and leg-separation pattern only when the child is ready for this progression.
Equipment: An approved sideways vaulting-box configuration, secure landing mats, and a trained gymnastics educator; use no improvised height or padding.
Setup: The educator checks the complete route and keeps the approach, box, and landing zone free of people and loose items.
Steps: Rehearse a floor straddle and hand placement first. If approved, the educator gives a single controlled attempt, then returns to a lower component skill.
Safety: This is not a general playground activity. Do not teach it without trained spotting and policy approval; no head, neck, or chest impact is permitted, and straight landing remains an acceptable endpoint.
Make It Easier: Practice stepping over a soft floor bar with feet apart and hands free.
Make It Harder: Repeat the same supervised pattern with a clear landing freeze; never add height or speed as the challenge.
Teacher Cue: "Hands on the box, legs make space, eyes on the mat, and wait for the teacher."
Activity 7-12: Lengthwise Box Progression

Lengthwise Box Progression

The source shows a lengthwise box crossing. Treat it as a specialist progression: begin with floor markers and use the apparatus only under trained, program-approved supervision.

Teacher Notes: Setup, Safety & Variations
Aim: Coordinate an approach and hand-support pathway while honoring the child's current control.
Equipment: A manufacturer-approved lengthwise vaulting-box setup with a secure springboard if required and fitted landing mats.
Setup: The trained educator verifies the setup and uses a single-child lane with a clear walk-out. Other children wait behind a marked line.
Steps: Practice the route with tape or floor spots. If the educator approves an apparatus attempt, use the same slow, demonstrated sequence and finish with a stable landing.
Safety: No child should self-select this progression or copy a pictured distance. Do not add a run, height, or rotation unless a qualified educator and the program policy specifically authorize it.
Make It Easier: Use a floor line, soft bar, or foam block to practice stepping and hand placement.
Make It Harder: Have the child explain where the hands and landing mat will be before one supervised attempt; completion is never required.
Teacher Cue: "Know the path before you move: approach, hands, box, mat, stop."
Frequently Asked Questions

Vaulting Box Work in Early Childhood — Teacher FAQ

Practical guidance on apparatus scope, floor preparation, readiness, mats, and trained educator supervision.

Are vaulting box activities a general preschool playground activity?
No. The early floor and soft-bar entries can be used as movement preparation, but any vaulting-box, springboard, elevated landing, or inversion variation belongs only in a program-approved apparatus lesson with trained instruction, inspected equipment, appropriate mats, and a clear supervision plan.
What is the safest starting point for a child who is new to vaulting?
Start on the floor with walking, stepping over a soft bar, two-foot takeoff practice, hand placement, and quiet landings. The child can build the movement sequence without a box. A trained educator decides whether the child is ready for the next component.
Can I reproduce the pictured box height or setup at home?
No. Do not copy a pictured height, combine household furniture, stack loose mats, or build a vaulting setup from improvised materials. Equipment selection, installation, matting, and supervision must follow the program's qualified staff and the manufacturer's instructions.
What should an educator do when a child is tired or unsure?
Stop the attempt, return to a floor-level component, and offer observation or a different movement. Do not use encouragement to push through fear, fatigue, wrist or shoulder discomfort, or a missed landing cue.
Why does this page use the term vaulting box?
Vaulting box is the clearest apparatus term for the illustrated equipment in this source chapter. It is kept distinct from a household box, a playground climber, and a generic jumping obstacle so the safety scope stays visible.
ADVERTISEMENT