ECE Movement Curriculum · Preschool and Pre-K

18 Parent-Child Movement Games for Preschoolers: Connection, Balance, and Floor-Level Play

Invite a caregiver and child to move together through 18 illustrated activities adapted for North American early childhood settings. The collection emphasizes choice, communication, floor-level movement, balance, crawling, jumping, and playful cooperation; lifting is never required.

ADVERTISEMENT

Quick Teacher Guide: Parent-Child Movement Play

Keep these four points in mind before setting up any of the 18 activities below:

Child and Caregiver Readiness

Use comfort, communication, attention, and movement control to choose a starting point. Age is context, not a performance cutoff; either partner may watch or opt out.

Floor-Level First

Begin with balance, walking, crawling, reaching, and animal-movement choices. No lifting, tossing, or elevated climbing is required for this collection.

Space and Mats

Use a firm, nonslip mat or carpet for floor activities, leave a clear exit, and separate pairs so a child cannot move into another family's space.

Consent and Communication

Ask before contact, describe the next movement, and agree on a stop word. Keep the adult stable and let the child choose the pace, distance, and no-touch alternative.

Chapter 2 — Illustrated Activity Cards

18 Parent-Child Movement Games

Browse the activity cards below. Each card pairs the original diagram with an independently written North American ECE adaptation, including setup, safety, and ways to simplify or extend the movement.
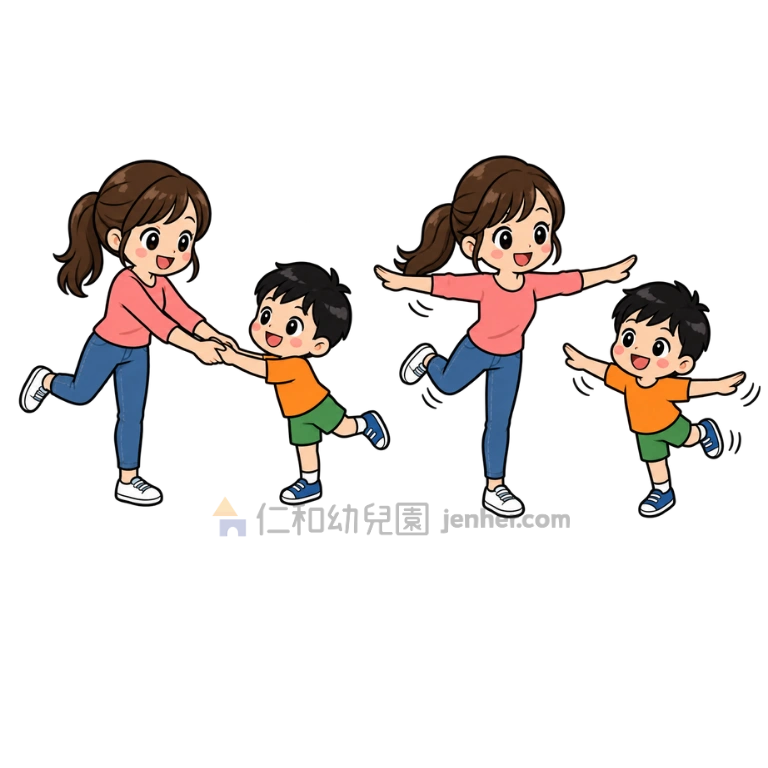
Activity 2-1: One-Foot Balance Check

One-Foot Balance Check

Invite the child to stand on one foot while the caregiver watches for a steady, comfortable balance. Switch sides when the child is ready.

Teacher Notes: Setup, Safety & Variations
Aim: Explore weight shifting and one-foot balance at the child's own pace.
Equipment: No equipment needed; a folded gym mat is optional.
Setup: Use a flat, uncluttered floor. The caregiver stands close enough to offer a hand without pulling the child off balance.
Steps: The child lifts one foot for a comfortable moment, lowers it with control, and repeats on the other side.
Safety: Keep the standing area clear. Offer a fingertip or wall support; never hold the raised leg or force a longer balance.
Make It Easier: Let the child keep the toes of the lifted foot lightly touching the floor.
Make It Harder: Add a slow reach forward or to each side while keeping the support foot planted.
Teacher Cue: "Find your tall tree shape. Which foot feels ready to lift?"
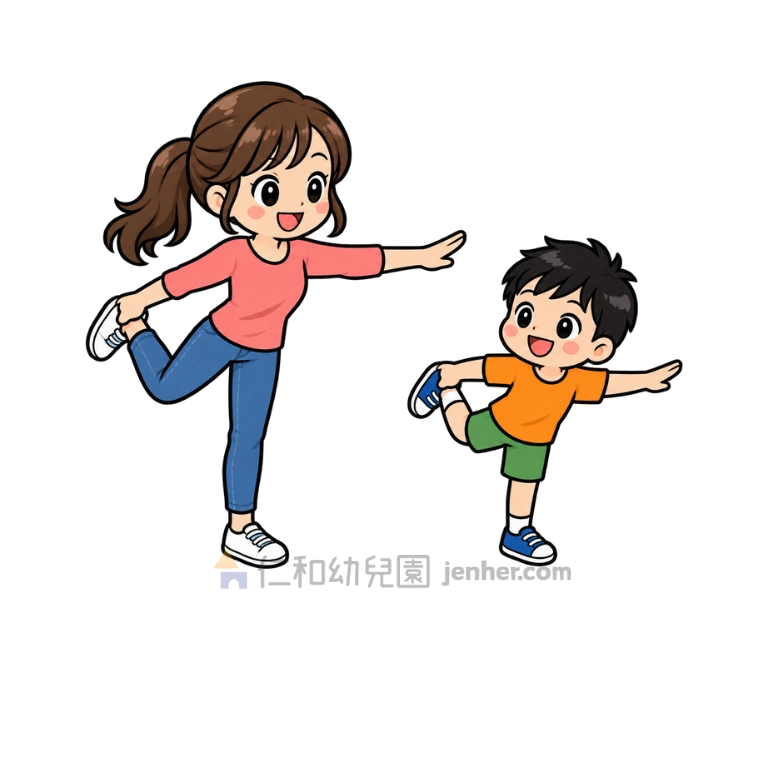
Activity 2-2: Ankle-Hold Balance

Ankle-Hold Balance

The child gently holds one ankle with one hand and balances on the other foot, then releases and changes sides.

Teacher Notes: Setup, Safety & Variations
Aim: Coordinate a small hand action with a stable standing position.
Equipment: No equipment needed; use a mat if the floor is hard.
Setup: Provide a clear personal space. The caregiver stays beside the child and offers a hand for balance if requested.
Steps: Bend one knee, hold the ankle lightly, find balance, lower the foot, and try the other side.
Safety: Hold only the ankle or shoe gently; do not pull the leg, twist the knee, or ask for a deep stretch.
Make It Easier: Keep both feet down and practice reaching one hand toward the ankle.
Make It Harder: Add a slow arm reach with the free hand while keeping the ankle hold light.
Teacher Cue: "Light hands, soft knee, and a steady standing foot."
Activity 2-3: Closing-Leg Timing Jump

Closing-Leg Timing Jump

The caregiver makes a wide leg shape, then brings the legs together on a clear count. The child jumps or steps over the closing cue and lands in open space.

Teacher Notes: Setup, Safety & Variations
Aim: Practice watching a partner and coordinating a jump or step with a changing visual cue.
Equipment: No equipment needed; floor spots are optional for the child's takeoff and landing area.
Setup: Use a flat, open area. The caregiver remains stationary and uses a small, predictable leg movement.
Steps: Start with a count, show the wide position, bring the legs together without sweeping, and let the child jump or step in place.
Safety: The caregiver's feet stay low and controlled. The child does not jump onto, between, or toward the caregiver's feet.
Make It Easier: Replace the jump with a step to a floor spot after the caregiver says "go."
Make It Harder: Vary the pause before the cue while keeping the movement slow and predictable.
Teacher Cue: "Watch, wait, and go when you see the closing shape. Land like a quiet feather."
Activity 2-4: Open-Leg Timing Jump

Open-Leg Timing Jump

The caregiver gives the opposite visual cue by opening the legs. The child responds with a small jump or step, then resets for another turn.

Teacher Notes: Setup, Safety & Variations
Aim: Notice a partner's body position and respond without rushing into another person's space.
Equipment: No equipment needed; a floor marker may show where the child returns after each response.
Setup: Keep the pair in a defined lane with no other feet or furniture nearby.
Steps: The caregiver stands still, shows the closed position, opens the legs on the agreed cue, and the child jumps or steps then freezes.
Safety: Use a low, non-contact leg position. Choose stepping whenever jumping or quick stopping is uncomfortable.
Make It Easier: Have the caregiver call "open" before moving so the child can anticipate the action.
Make It Harder: Mix open and closed cues and ask the child to name the shape before moving.
Teacher Cue: "See the open shape, move to your spot, and freeze."
Activity 2-5: Caregiver Arm Tunnel

Caregiver Arm Tunnel

The caregiver sets hands on the floor in a stable supported position while the child crawls underneath and out the other side.

Teacher Notes: Setup, Safety & Variations
Aim: Explore crawling through a familiar partner-made pathway.
Equipment: A gymnastics mat or thick carpet with a nonslip surface.
Setup: Place the caregiver on hands and knees or another stable supported position, with a clear exit path.
Steps: The caregiver holds a steady position, the child enters from one side, crawls through, and returns around the outside.
Safety: The caregiver must be comfortable bearing their own weight and must not shift while the child is underneath. Keep the child's head and neck clear of elbows and knees.
Make It Easier: Use a large play tunnel or let the child crawl beside the caregiver's body.
Make It Harder: Place a soft floor spot at the exit for the child to touch before walking back.
Teacher Cue: "Check the tunnel, crawl low, and come out where I can see you."
Activity 2-6: Back-Arch Tunnel Crawl

Back-Arch Tunnel Crawl

A comfortable caregiver makes a low arch with the body while the child crawls through the open space, then walks around to reset.

Teacher Notes: Setup, Safety & Variations
Aim: Use a low pathway to practice crawling, orientation, and cooperative turn-taking.
Equipment: A nonslip gymnastics mat or carpet.
Setup: The caregiver chooses a stable, comfortable arch and the child approaches from the side rather than running in.
Steps: The caregiver makes the arch, the child crawls through without touching the adult, and both reset before the next pass.
Safety: Only use a posture the caregiver can hold comfortably. No child climbs on the caregiver, and no one pushes or pulls the adult's legs.
Make It Easier: Make the tunnel with a play tunnel or two sturdy cushions instead.
Make It Harder: Add a soft toy at the exit for the child to retrieve and carry back.
Teacher Cue: "Your path is open. Crawl through gently and keep your eyes on the exit."
Activity 2-7: Bridge Tunnel Crawl

Bridge Tunnel Crawl

With the caregiver supported on a mat, the child crawls through the open space under the caregiver's bridge shape and returns around the side.

Teacher Notes: Setup, Safety & Variations
Aim: Combine a partner-made tunnel with crawling and a simple consent-and-communication routine.
Equipment: A firm gymnastics mat; the caregiver should use a comfortable supported floor position.
Setup: Clear the mat and the exit. The caregiver announces when the bridge is ready and remains still during the crawl.
Steps: The caregiver sets the bridge shape, the child crawls through at a walking pace, and the caregiver lowers only after the child is clear.
Safety: Do not place pressure on the caregiver's neck or spine, and do not let the child climb over the bridge. Stop if either partner feels strain or uncertainty.
Make It Easier: Use a foam tunnel, or let the child crawl under the caregiver's raised arm instead.
Make It Harder: Have the child carry a soft beanbag through the tunnel without dropping it.
Teacher Cue: "Ask first, wait for ready, crawl through, and give the bridge space."
Activity 2-8: Reach-and-Jump Partner Cue

Reach-and-Jump Partner Cue

The caregiver offers a hand target while the child makes a small vertical jump or reaches up to touch it, then lands with control.

Teacher Notes: Setup, Safety & Variations
Aim: Coordinate an upward reach with a controlled takeoff and landing.
Equipment: No equipment needed; a mat is optional on a suitable floor.
Setup: Stand in a clear space with the caregiver's hand held at a comfortable, reachable level.
Steps: The caregiver shows the target, the child bends knees, jumps or reaches, touches only if comfortable, and lands on two feet.
Safety: The caregiver does not pull, lift, or raise the target while the child is airborne. The child may reach without jumping.
Make It Easier: Practice a knee bend and reach from the floor without leaving the ground.
Make It Harder: Move the target slightly left or right while keeping it low enough for a controlled response.
Teacher Cue: "Bend, reach, and land softly. You choose whether your feet leave the floor."
Activity 2-9: Monkey Climb and Supported Back Rock

Monkey Climb and Supported Back Rock

The source illustration shows a child climbing a caregiver and the adult assisting a backward flip. In this adaptation, the child climbs around a stationary caregiver on a mat, keeping backward rolls or flips as optional trained-adult variations with floor bear-walk alternatives.

Teacher Notes: Setup, Safety & Variations
Aim: Explore climbing around a partner while practicing communication and controlled weight shifts.
Equipment: A gymnastics mat; no elevated climbing structure.
Setup: Use a clear mat. The caregiver kneels or sits in a stable position and keeps the child at floor level.
Steps: The child climbs around the caregiver's side or back without pulling the neck. If the adult is trained and both are ready, add a slow supported backward rock on the mat.
Safety: The child never climbs on the head, neck, or face. Do not attempt a backward roll, lift, or toss without appropriate training and close support; an observe-only option is always available.
Make It Easier: Use animal walks around the caregiver instead of climbing over the body.
Make It Harder: Add a pause at a stable kneeling or seated shape before walking around the partner.
Teacher Cue: "Hands find a steady place, keep away from the neck, and stop when either partner says stop."
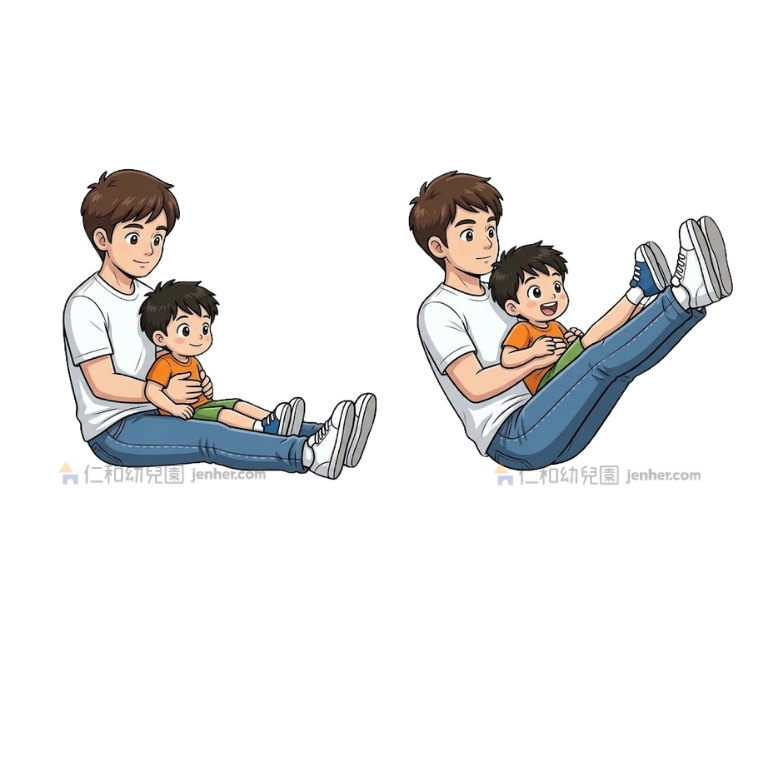
Activity 2-10: Supported Shoulder Roll

Supported Shoulder Roll

The source image shows a child rolling over a caregiver's shoulder. Use that variation only with a trained adult on a mat; otherwise practice a separate floor forward roll beside the caregiver.

Teacher Notes: Setup, Safety & Variations
Aim: Explore forward body orientation while keeping the head and neck protected.
Equipment: A firm gymnastics mat and an adult with appropriate movement-teaching training for the supported version.
Setup: Clear the mat and use one child at a time. The caregiver demonstrates the floor pathway before any supported variation.
Steps: Start with a tucked rocking shape on the mat. A trained adult may guide a slow shoulder-over roll; the child finishes on the mat with hands free and eyes forward.
Safety: Never roll over an unprepared shoulder, pull the child's head, or allow the crown of the head to take weight. Stop at rocking if the child is unsure.
Make It Easier: Practice rocking from a tucked sit or a gentle floor roll with the caregiver beside the child.
Make It Harder: Add a clear stand-and-reset after a controlled floor roll, without increasing speed.
Teacher Cue: "Tuck your chin, look toward your belly, and roll over your shoulder—not your head."
Activity 2-11: Partner Seesaw Lean

Partner Seesaw Lean

Sit facing each other, hold hands lightly, and lean back and forward together like a gentle seesaw. Release hands whenever either partner wants to stop.

Teacher Notes: Setup, Safety & Variations
Aim: Practice shared rhythm, seated balance, and communicating force with a partner.
Equipment: A mat or carpeted floor.
Setup: Sit with legs comfortably arranged and enough space behind each person for a small lean.
Steps: Face each other, make a light hand connection, lean back a little, return upright, and trade the direction without jerking.
Safety: Use a light handhold rather than pulling. Avoid locked elbows, sudden tugs, and forced range of motion.
Make It Easier: Place hands on the floor beside the body and rock without holding hands.
Make It Harder: Add a slow count or change from a forward-facing sit to a comfortable straddle sit.
Teacher Cue: "We move together—small lean, easy return, and listen to your partner."
Activity 2-12: Caregiver Body Slide

Caregiver Body Slide

The caregiver makes a stable, low slide shape while the child scoots down onto a mat. A floor-only pathway is the default when the adult cannot hold the shape comfortably.

Teacher Notes: Setup, Safety & Variations
Aim: Explore a playful change of level and direction with a trusted adult.
Equipment: A gymnastics mat or thick carpet; use a real low slide when a stable adult-made shape is not appropriate.
Setup: The caregiver chooses a supported floor position with the child's landing area directly on the mat.
Steps: The caregiver braces a low shape, the child scoots slowly down, pauses on the mat, and walks around to reset.
Safety: The adult does not lift or launch the child. Do not use the adult's arms as a slide if elbows, wrists, back, or the child's landing cannot remain stable.
Make It Easier: Make a slide path with a wedge mat or have the child scoot along the floor beside the caregiver.
Make It Harder: Let the child choose a slow, medium, or stop signal during the scoot.
Teacher Cue: "Slow scoot, feet to the mat, and tell me when you are ready to go."
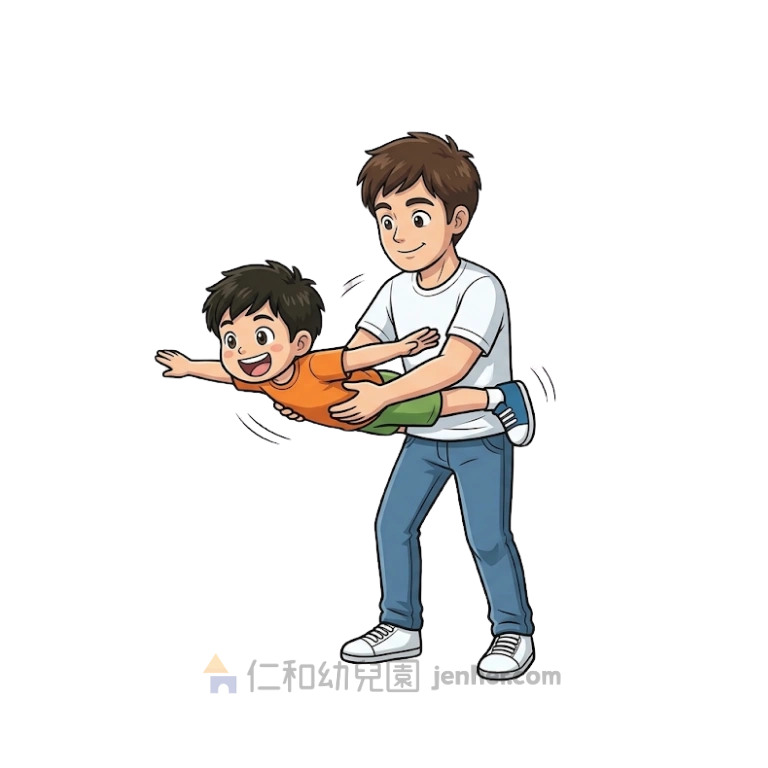
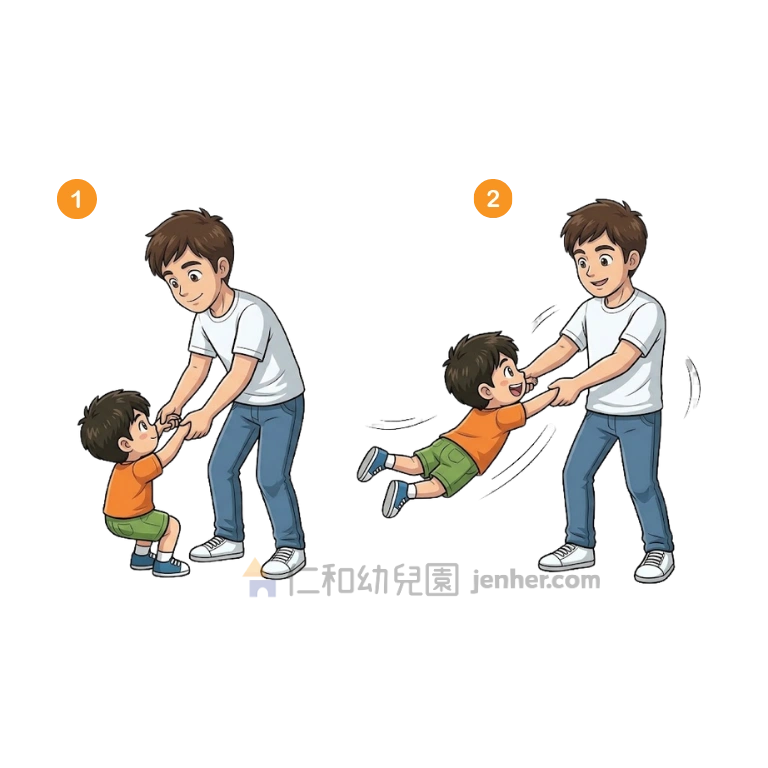
Activity 2-13: Supported Airplane Pose

Supported Airplane Pose

The illustration shows the child balanced belly-down with the caregiver's feet supporting the body. Treat it as an optional trained-adult variation; a grounded airplane pose is the everyday starting point.

Teacher Notes: Setup, Safety & Variations
Aim: Explore an airplane body shape and partner communication without requiring a lift.
Equipment: A gymnastics mat; no elevated surface.
Setup: Start on the floor with the caregiver close. Any lifted or feet-supported version requires a trained adult, a clear landing area, and one child at a time.
Steps: Begin with the child lying on the belly and reaching arms wide. If the adult is trained and the child opts in, use brief, fully supported contact and return immediately to the mat.
Safety: No tossing, swinging, or unsupported lifting. The caregiver must support the child's trunk and stop at the first sign of fear, strain, or loss of control.
Make It Easier: Use a standing airplane with arms wide, or lie belly-down on the mat and lift arms only.
Make It Harder: Add a slow turn of the head to look toward a named object while the body stays grounded.
Teacher Cue: "Airplane arms, grounded body, and a clear ‘stop’ signal."
Activity 2-14: Slow Partner Airplane Turn

Slow Partner Airplane Turn

The source illustration shows an adult lifting and spinning a child in the air. For everyday preschool active play, adapt this by walking a slow circle together with feet on the floor, avoiding fast spinning or lifting.

Teacher Notes: Setup, Safety & Variations
Aim: Coordinate direction, speed, and a shared turning pathway.
Equipment: No equipment needed; floor spots can mark the center and the walking boundary.
Setup: Use a spacious, clear area with the caregiver and child walking—not spinning—in a predictable circle.
Steps: Face each other, hold hands lightly, stretch airplane arms, and walk a small circle before returning to the starting spot.
Safety: Avoid fast spinning, pulling, or lifting. Stop for dizziness and leave generous space from other pairs.
Make It Easier: Walk a short arc or stand in place and tilt airplane arms left and right.
Make It Harder: Change direction on a verbal cue while keeping the pace slow.
Teacher Cue: "Walk your airplane around the circle—slow feet, wide space, easy stop."
Activity 2-15: Supported Backward Lean

Supported Backward Lean

With a secure handhold, the child leans backward a comfortable amount while the caregiver stays close, then returns to standing with control.

Teacher Notes: Setup, Safety & Variations
Aim: Notice a backward weight shift and return to upright while breathing steadily.
Equipment: A mat or carpeted floor; a wall may provide an optional visual boundary.
Setup: Stand on a nonslip surface with a clear area behind the child. The caregiver uses a stable stance and a light, agreed handhold.
Steps: Agree on a stop signal, soften the knees, lean back slightly as one unit, pause for a breath, and return upright.
Safety: Do not pull the child's arms backward or require a fixed right-angle position. The caregiver must be ready to release rather than catch a falling child.
Make It Easier: Practice a small lean toward a wall or keep one hand on the wall.
Make It Harder: Add a slow arm reach while the feet remain planted and the lean stays small.
Teacher Cue: "Breathe in tall, lean only as far as comfortable, and come back on your own signal."
Activity 2-16: Return from the Supported Lean

Return from the Supported Lean

From the supported lean, the child presses through the feet and returns upright with the caregiver's steady hand nearby rather than pulling the child up.

Teacher Notes: Setup, Safety & Variations
Aim: Practice reversing a weight shift and regaining upright balance.
Equipment: A mat or carpeted floor.
Setup: Keep the pair away from walls, furniture, and other children. The caregiver stands beside rather than behind the child.
Steps: Start with a small lean, cue the child to press through both feet, bring the hips under the shoulders, and finish tall.
Safety: The child returns only from a comfortable range. The caregiver offers a hand for balance but does not yank the arms or catch a backward fall.
Make It Easier: Use a wall touch or begin from a nearly upright lean.
Make It Harder: Pause halfway back and hold the balance before standing fully.
Teacher Cue: "Feet press, hips come under you, and finish tall."
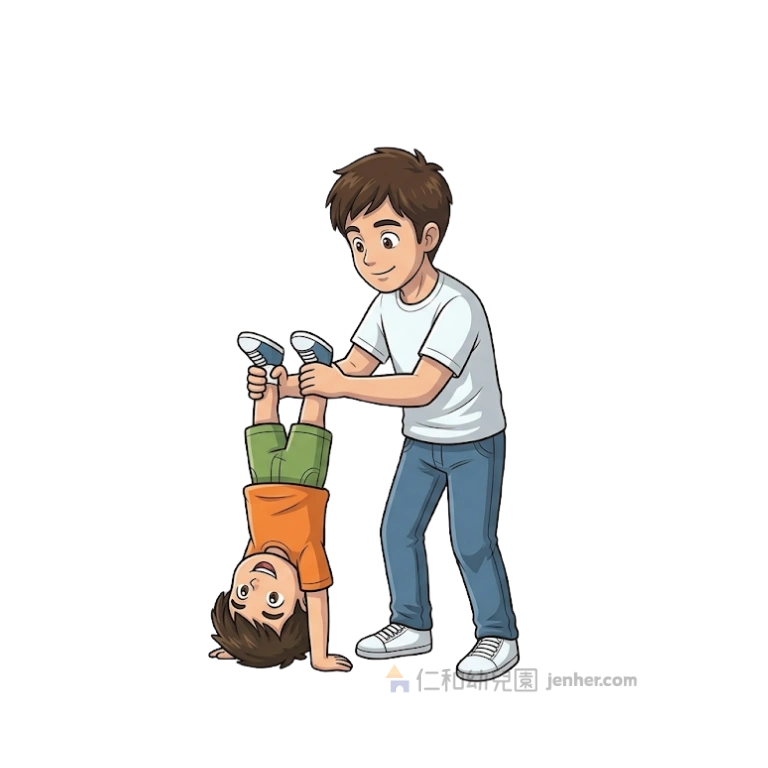
Activity 2-17: Supported Handstand Exploration

Supported Handstand Exploration

The source shows a caregiver supporting the child's legs in an inverted position. For preschool settings, begin with bear-walk hand support; any assisted inversion is an optional trained-adult activity.

Teacher Notes: Setup, Safety & Variations
Aim: Explore weight through the hands and changes in body orientation without making inversion a requirement.
Equipment: A firm gymnastics mat and an adult with appropriate gymnastics safety training for any assisted inversion.
Setup: Use a clear mat with one child at a time. Start with hands-and-feet bear support, not a kick-up against a wall.
Steps: Practice bear walks and a brief hands-down, hips-high shape. A trained adult may support the child's legs only after checking readiness and explaining the stop signal.
Safety: Never pull the legs, force a kick-up, load the neck, or use an untrained peer as a spotter. Stop for wrist, shoulder, head, or neck discomfort.
Make It Easier: Place hands on a low foam wedge or practice tabletop weight shifts.
Make It Harder: Add alternating hand taps from a stable bear position while keeping both feet on the mat.
Teacher Cue: "Strong hands, soft elbows, head free, and stop whenever your body says stop."
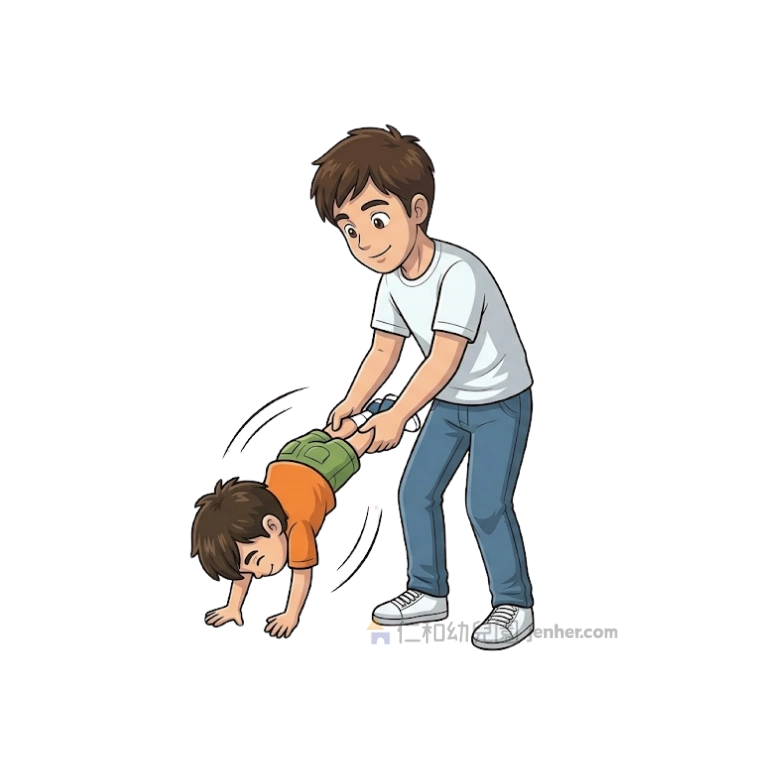
Activity 2-18: Supported Wheelbarrow Walk

Supported Wheelbarrow Walk

The caregiver supports the child's lower legs while the child walks forward on the hands. Keep the route short, slow, and optional; a bear walk is the independent alternative.

Teacher Notes: Setup, Safety & Variations
Aim: Coordinate alternating hand steps with partner support and body awareness.
Equipment: A firm gymnastics mat or carpeted floor.
Setup: Use a short, straight, obstacle-free lane with the caregiver walking beside the child.
Steps: The child starts from hands and knees, the caregiver supports the lower legs without lifting high, and the child takes a few hand steps before returning to the mat.
Safety: Do not race, swing, or lift the child's legs above a comfortable line. Stop for wrist, shoulder, back, or fear signals; never use a peer as the supporting adult.
Make It Easier: Practice a bear walk or move one hand forward at a time while the knees stay down.
Make It Harder: Place two soft floor spots to touch in sequence, without increasing the distance or speed.
Teacher Cue: "Hands walk one at a time. I am right beside you, and we stop when you say stop."
Frequently Asked Questions

Parent-Child Movement Play — Teacher FAQ

Practical guidance on caregiver participation, consent, floor-level adaptations, and inclusive early childhood movement play.

How can a caregiver join without lifting or carrying the child?
Use floor-level choices first: one-foot balance, hand targets, crawling tunnels, side-by-side walking, and animal walks. The caregiver can model, offer a stable hand, or hold a soft tunnel while the child chooses the movement. A child never needs to be lifted to participate.
What should I do if a child does not want physical contact?
Make observation, parallel movement, and no-touch choices part of the lesson. The adult can use floor spots, a scarf, a soft toy, or a verbal cue instead of touching. Ask before each partner variation and stop immediately when either partner says stop.
Are the rolling and inversion activities appropriate for every preschool setting?
No single activity is appropriate for every child, adult, or setting. Use the floor-level alternatives on the cards by default. Any supported roll, handstand, or inversion requires a trained adult, a suitable mat, program approval, and a readiness decision based on the individual child.
How do I organize these activities for a family event or classroom?
Set up separate caregiver-child stations with one clear movement at each station. Keep waiting families outside the active mat, use short turns, and let children choose whether to watch, copy the adult, or try independently. This keeps the interaction playful without making completion the goal.
What developmental learning can educators observe?
Educators may observe balance, crawling, jumping, coordination, communication, confidence, and self-regulation. These are opportunities for observation rather than guarantees or diagnostic measures. Record what the child chooses, how the child adapts, and what support helps participation.
ADVERTISEMENT