ECE Movement Curriculum · Trained Apparatus Programs

14 Horizontal Bar Activities for Preschoolers: Grip, Body Orientation, and Grounded Progressions

This illustrated Chapter 12 adaptation keeps single-horizontal-bar work inside a professional apparatus program. Start with grounded grip and body-orientation play, then use only approved equipment, suitable mats, and trained supervision for any hang or rotation.

ADVERTISEMENT

Quick Teacher Guide: Horizontal Bar Work

Keep these four boundaries in mind before reviewing any of the 14 illustrated activities below:

Professional Apparatus

Use a program-approved, inspected horizontal bar with appropriate mats and trained supervision. This page is not a doorway-bar or home-installation guide.

No Universal Height

Do not copy the illustration's height, hold time, or reach. Follow the equipment maker's instructions and the program's apparatus policy.

Floor Alternatives

Begin with grounded grip, tuck, bridge, rocking, and body-orientation choices. Hanging and rotation are optional specialist progressions, never requirements.

Release and Stop Signals

Explain the return-to-floor plan before a turn. Stop before fatigue or fear, keep the fall space clear, and let the child watch or choose another activity.

Chapter 12 — Illustrated Activity Cards

14 Horizontal Bar Activities and Alternatives

The cards preserve the source sequence while clearly separating grounded preparation from advanced apparatus work. Expand Teacher Notes for equipment scope, return-to-floor steps, and safer alternatives.
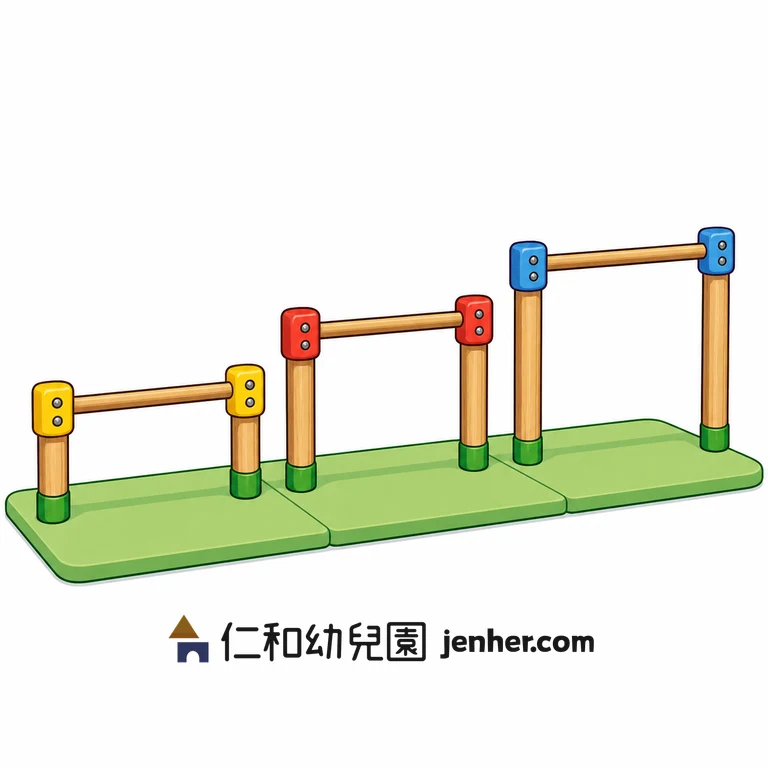
Activity 12-1: Bar Height and Grip Exploration

Bar Height and Grip Exploration

Use an approved horizontal bar setup and let the child explore reaching, holding, and returning to the floor. Do not copy a pictured height as a universal preschool standard.

Teacher Notes: Setup, Safety & Variations
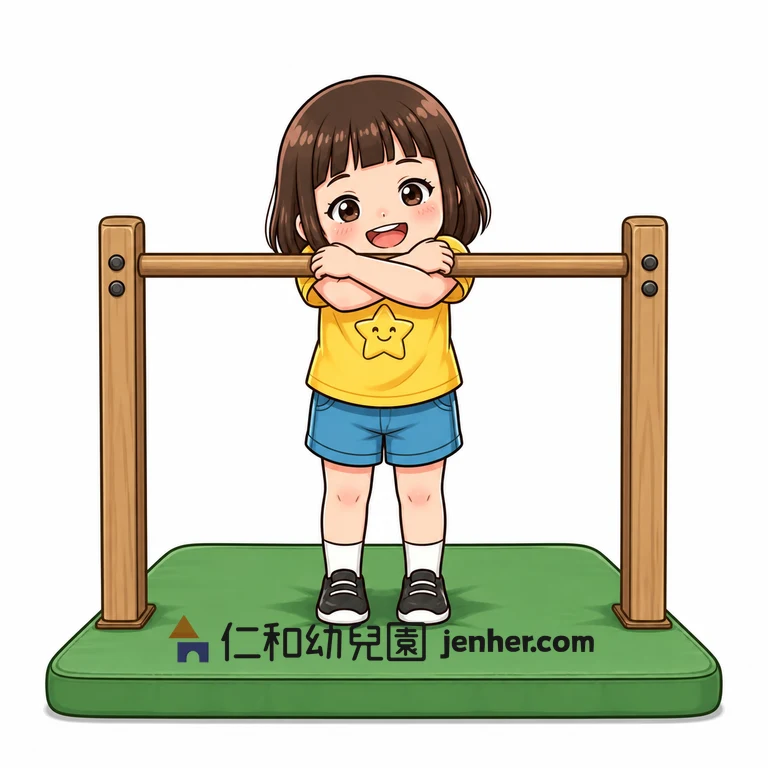
Aim: Become familiar with a bar and a controlled start-and-return routine.
Equipment: A program-approved horizontal bar with landing mats, installed and checked according to the equipment maker's instructions.
Setup: The educator checks the bar, mat, floor, and child's reach before the child approaches. Keep the space below and around the bar clear.
Steps: Walk to the bar, reach or hold as demonstrated, keep feet supported unless the educator approves a hang, release on cue, and step away.
Safety: There is no universal bar height in this card. Do not use a doorway bar, loose bar, or unapproved setup; follow the manufacturer's and program's policy.
Make It Easier: Touch a floor-level dowel held by the educator or practice reaching without hanging.
Make It Harder: Practice changing from an underhand to an overhand grip while feet remain grounded.
Teacher Cue: "Check the bar, reach with two hands, and return before you feel tired."
Activity 12-2: Chest-to-Bar Hold

Chest-to-Bar Hold

The child brings the chest close to an approved bar while keeping the feet supported or lightly assisted, exploring a secure body position rather than hanging freely.

Teacher Notes: Setup, Safety & Variations
Aim: Notice how the hands, chest, and feet work together around a stable bar.
Equipment: An approved horizontal bar, secure landing mat, and trained educator; use a floor-level prop for the entry version.
Setup: Position the child close to the bar with a clear mat below. The educator stays beside the child and supports only as the program policy permits.
Steps: Hold the bar with both hands, bring the chest close while keeping feet supported, pause for a breath, and step down or release on cue.
Safety: Do not squeeze the chest, pull the child over the bar, or let the child hang beyond their control. Stop for hand, shoulder, chest, or fear signals.
Make It Easier: Hug a soft bolster at floor level while practicing hand placement on a low dowel.
Make It Harder: Shift one foot at a time while keeping at least one foot supported and the body close to the bar.
Teacher Cue: "Two hands, feet supported, chest close, and easy release."
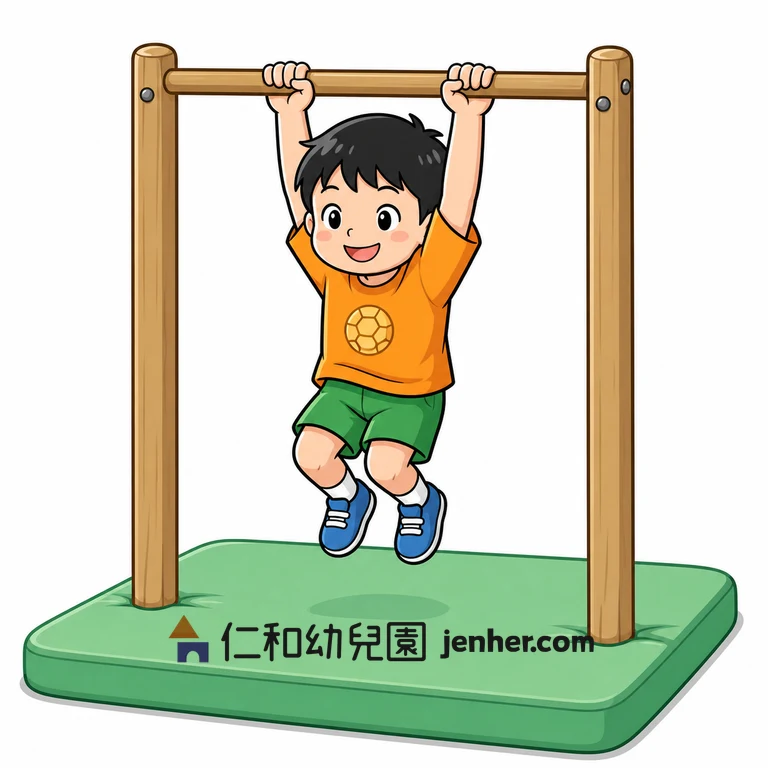
Activity 12-3: Two-Hand Hang

Two-Hand Hang

With an approved bar and close trained supervision, the child holds with both hands for a comfortable brief hang, then returns to the mat or floor under control.

Teacher Notes: Setup, Safety & Variations
Aim: Explore a brief supported hang and a calm return to the floor.
Equipment: An approved horizontal bar, secure landing mat, and trained adult supervision.
Setup: Check the bar and mat before each turn. The educator stays close, keeps the drop area clear, and explains how to release safely.
Steps: Grip with both hands, lift the feet only if the educator confirms the setup and readiness, hold briefly, then lower or release with bent knees and a clear landing.
Safety: Do not set a required hang time, pull the child upward, or leave the child unattended. Stop before grip fatigue, skin pain, dizziness, or fear.
Make It Easier: Keep one or both feet on a mat, box, or educator-supported surface while practicing the grip.
Make It Harder: Change from a still hang to a tiny controlled weight shift without swinging.
Teacher Cue: "Grip, breathe, check your body, and come down before your hands get tired."
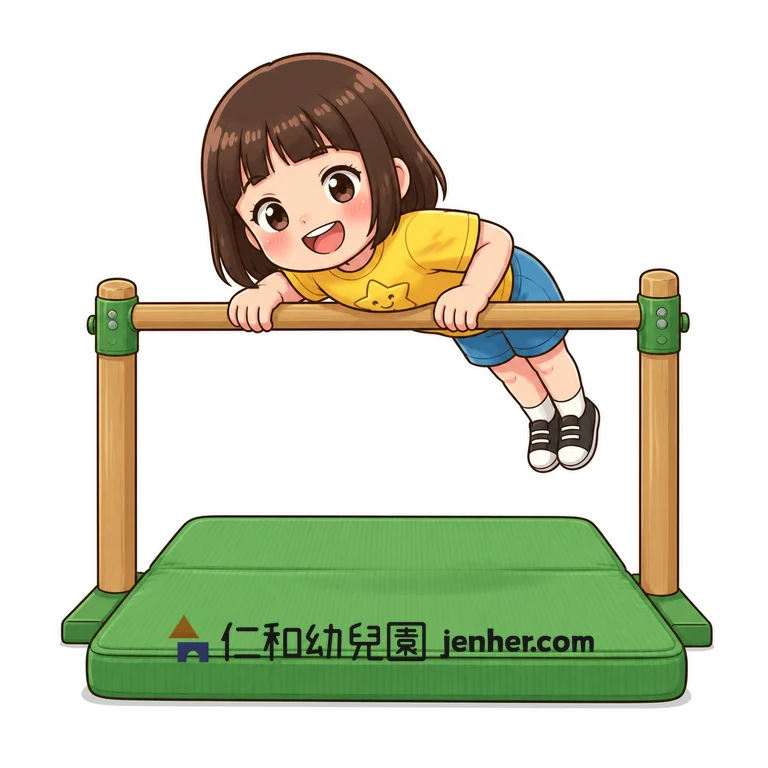
Activity 12-4: Belly-Supported Bar Shape

Belly-Supported Bar Shape

The child explores the source's belly-over-bar shape only with an approved apparatus, a landing mat, and trained support; a prone floor pose is the default alternative.

Teacher Notes: Setup, Safety & Variations
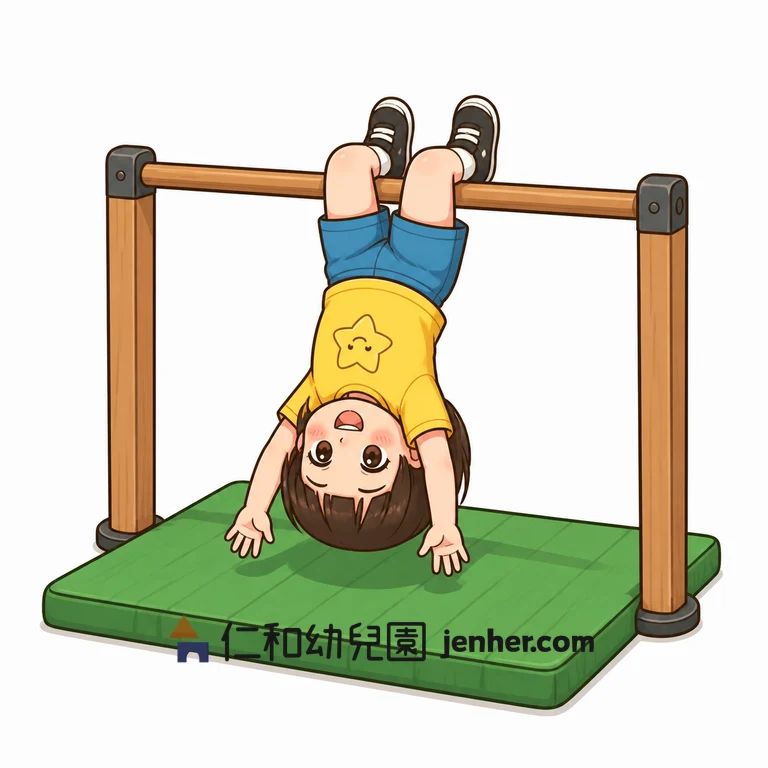
Aim: Notice a supported body line and an intentional return without making an inversion goal.
Equipment: An approved horizontal bar, fitted mat, and a trained educator familiar with the program's apparatus policy.
Setup: Use one child at a time with the mat directly below and a clear route away from the bar. The educator explains the exit first.
Steps: Begin with a belly-down floor shape. If approved, the educator helps the child place the trunk over the bar with hands secure, pauses briefly, and guides a controlled return.
Safety: Do not place pressure on the throat, abdomen, or joints, and do not let the child slide or roll off unexpectedly. Stop if the child cannot release on cue.
Make It Easier: Practice a prone lift of the arms and legs on a mat.
Make It Harder: Name the body parts touching the bar or mat before returning, without extending the hang.
Teacher Cue: "Hands secure, body supported, know your exit, and stop on your signal."
Activity 12-5: Advanced Ankle-Hook Shape

Advanced Ankle-Hook Shape

The source shows a child hanging upside down with the legs hooked over the bar. Treat this as an advanced, optional gymnastics skill requiring trained instruction and approved equipment.

Teacher Notes: Setup, Safety & Variations
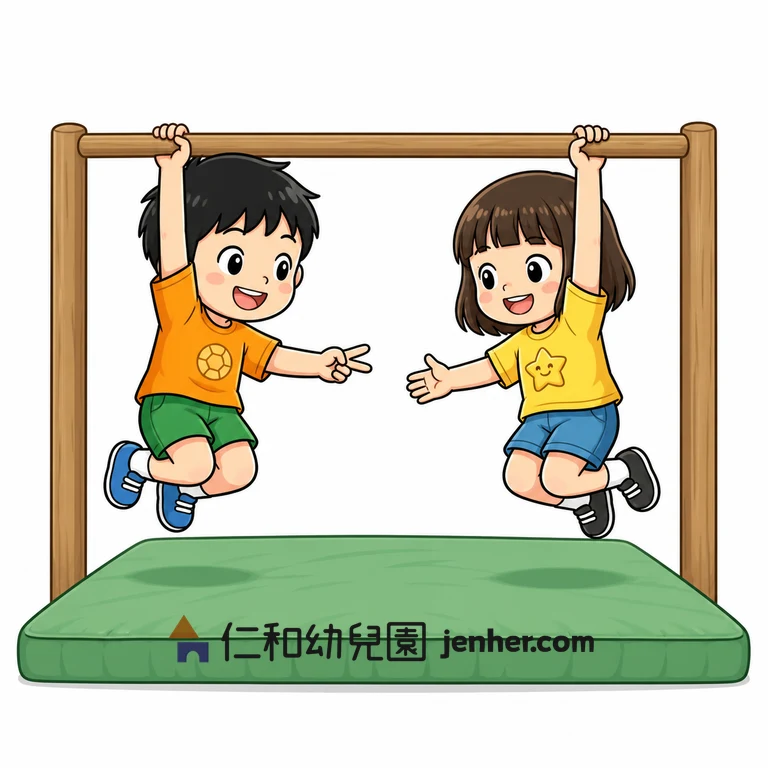
Aim: Provide a transparent source reference for an advanced inversion without presenting it as routine preschool play.
Equipment: Only a program-approved horizontal bar, fitted landing mat, and an appropriately trained gymnastics educator.
Setup: A specialist educator checks equipment, readiness, and the clear fall space. Other children remain outside the apparatus area.
Steps: Use floor-level leg and body-orientation games first. An educator may demonstrate or offer a fully supported progression only under the program's documented policy.
Safety: Do not attempt an ankle hook, inversion, or release at home or without trained support. Never force the child's legs over the bar, and stop for fear, pressure, or grip fatigue.
Make It Easier: Play upside-down animal shapes on a mat with feet on the floor.
Make It Harder: Have the child watch a trained demonstration and describe the safe exit; observation is a valid participation choice.
Teacher Cue: "Advanced skill means trained support, clear exit, and permission to watch instead."
Activity 12-6: Hanging Hand-Sign Game

Hanging Hand-Sign Game

A child who can already use the approved bar safely makes a hand sign or answers a partner's prompt from a brief supported hang; the partner stays on the floor.

Teacher Notes: Setup, Safety & Variations
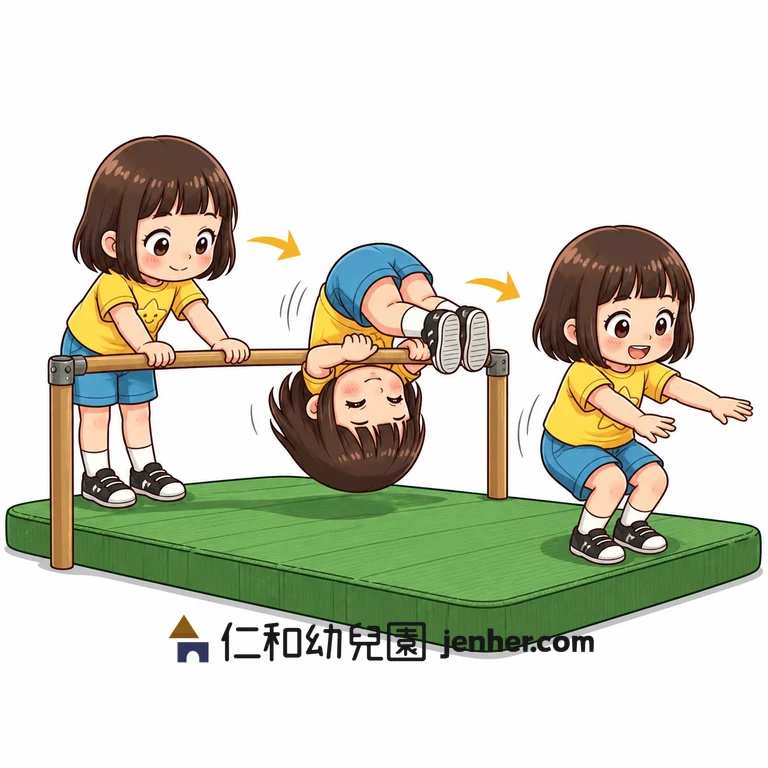
Aim: Add a social prompt to a familiar grip routine without extending the hang.
Equipment: An approved horizontal bar, landing mat, and simple picture or hand-sign cards if helpful.
Setup: Only one child uses the bar. The partner stands outside the fall area and waits for the child to return before changing roles.
Steps: The child grips or briefly hangs as approved, shows a sign, returns to the floor, and then the partner takes a turn.
Safety: Do not ask children to look away, reach for a partner, or stay up until the game is decided. The partner never touches the hanging child or bar.
Make It Easier: Play the hand-sign game with both children standing on the floor.
Make It Harder: Have the educator call a sign after the child has returned to the floor, keeping the apparatus portion unchanged.
Teacher Cue: "Bar first, sign second, feet down before the partner moves."
Activity 12-7: Supported Forward Roll-Down

Supported Forward Roll-Down

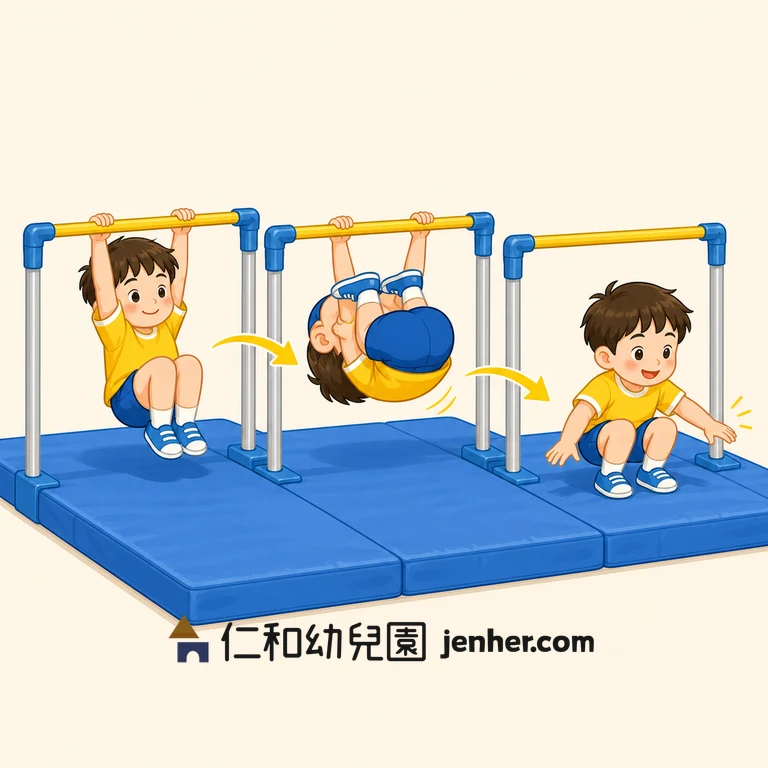
The source shows a forward roll around the bar. This is a specialist skill: use it only in a trained program with an approved apparatus, mats, and an explicit exit plan.

Teacher Notes: Setup, Safety & Variations
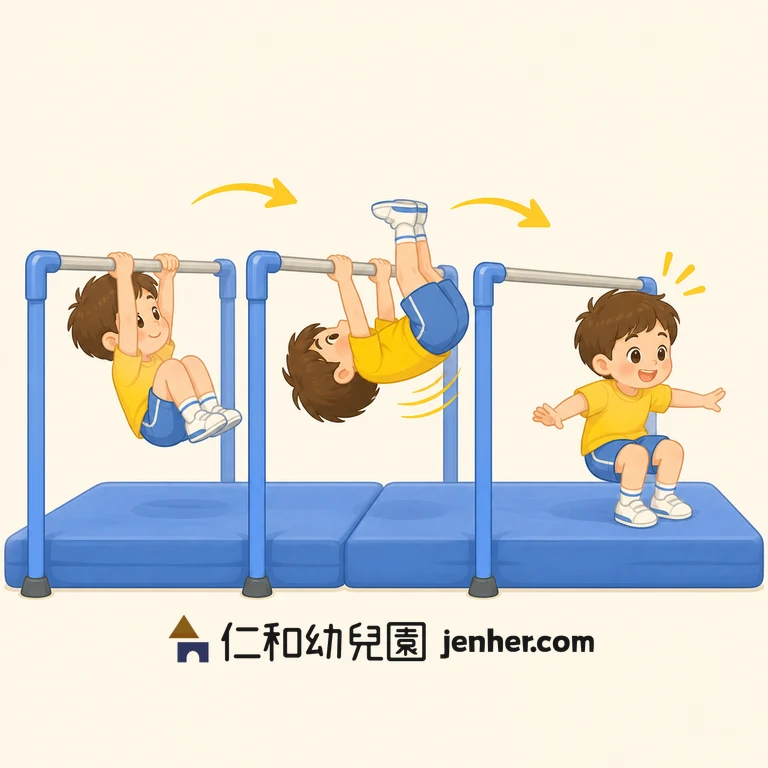
Aim: Frame the source's forward rotation as a supervised apparatus progression rather than a general classroom instruction.
Equipment: An approved horizontal bar, fitted landing mats, and a trained gymnastics educator who follows the program's spotting policy.
Setup: The educator rehearses a floor tuck and the landing pathway first. Keep the fall and roll-out area completely clear.
Steps: Practice tuck-and-roll on the mat. If the educator confirms readiness, the educator controls the bar entry, rotation, and return; the child stops at any stage.
Safety: Do not copy the illustration without trained instruction. Protect the head and neck, do not pull the child through the rotation, and never require a release or full turn.
Make It Easier: Practice a forward roll on a mat with a chin-tuck cue.
Make It Harder: Rehearse the hand and foot sequence with a low prop on the floor rather than adding bar height or speed.
Teacher Cue: "Tuck, roll over the shoulder, and follow the teacher's safe exit."
Activity 12-8: Supported Backward Rotation Preview

Supported Backward Rotation Preview

The source shows a backward rotation around the bar. Use a floor-level backward rocking preparation or an educator demonstration; do not teach a child to attempt it independently.

Teacher Notes: Setup, Safety & Variations
Aim: Build awareness of backward weight shift while keeping the advanced apparatus action within professional scope.
Equipment: A program-approved horizontal bar and fitted mat only for a trained specialist lesson; a mat is enough for the floor preparation.
Setup: Keep the bar zone closed to other children. Rehearse a backward rock on the mat with the educator explaining the exit before any apparatus demonstration.
Steps: Rock gently from a tucked sit on the mat. A trained educator may demonstrate or provide a supported progression under policy; the child may watch instead.
Safety: No unsupervised backward roll, drop, or neck loading. Do not pull the child backward or use a bar that has not been inspected and secured.
Make It Easier: Rock back to the shoulders on a mat and return to sitting with hands free.
Make It Harder: Add a verbal stop-and-return cue to the floor rock, without using the bar.
Teacher Cue: "Know where your back goes, keep your neck free, and choose watch or try."
Activity 12-9: Feet-Through Grip Exploration

Feet-Through Grip Exploration

The source shows the feet passing between the hands before a roll. Begin with a floor-level tuck-and-roll pattern; any bar version belongs only in a trained apparatus lesson.

Teacher Notes: Setup, Safety & Variations
Aim: Explore a tuck shape and body pathway without making a bar rotation a requirement.
Equipment: A gymnastics mat for the entry version; an approved bar and trained educator are required for any apparatus variation.
Setup: Use a clear mat and teach the floor pattern before the child approaches equipment.
Steps: Sit in a tuck, place hands beside the body, bring knees toward the chest, and rock or roll on the mat. Stop before the head or neck takes pressure.
Safety: Do not force the feet through a grip or pull the legs over a bar. Keep the crown of the head from taking direct weight and use trained support for any advanced version.
Make It Easier: Rock backward and forward without rolling over.
Make It Harder: Add a controlled side-to-side tuck rock while keeping the neck relaxed.
Teacher Cue: "Knees tuck, hands support, chin stays gently toward the chest."
Activity 12-10: Small-Sway Hang

Small-Sway Hang

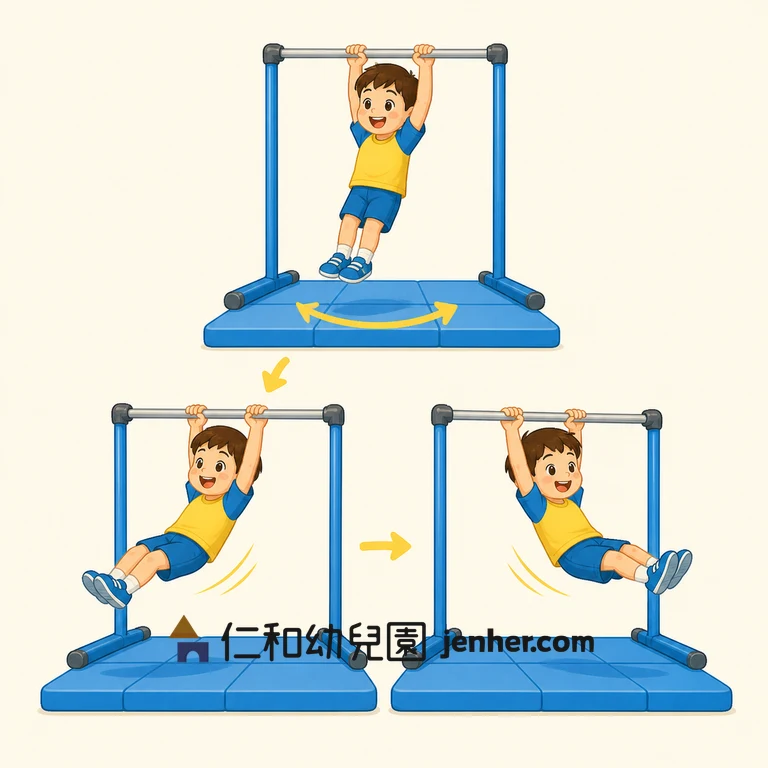
After a stable two-hand hang is familiar, a trained educator may invite a tiny forward-and-back weight shift. It is not a swing or release activity.

Teacher Notes: Setup, Safety & Variations
Aim: Notice a small shift of body weight while preserving grip and an intentional stop.
Equipment: An approved horizontal bar, secure mat, and trained educator.
Setup: Clear the entire movement and landing area. The educator defines the small range and the return-to-floor cue before the hang.
Steps: Begin from a still supported hang, shift a little forward and back, stop the motion, and return to the floor before fatigue.
Safety: No large swing, twisting, kicking, or release. Stop for skin pain, grip fatigue, dizziness, or any loss of body control.
Make It Easier: Shift weight between two grounded feet while holding a low bar.
Make It Harder: Match one small sway to a slow count, then stop and release safely.
Teacher Cue: "Tiny sway, quiet body, stop, and come down while your grip is fresh."
Activity 12-11: Swing-to-Mat Landing Rehearsal

Swing-to-Mat Landing Rehearsal

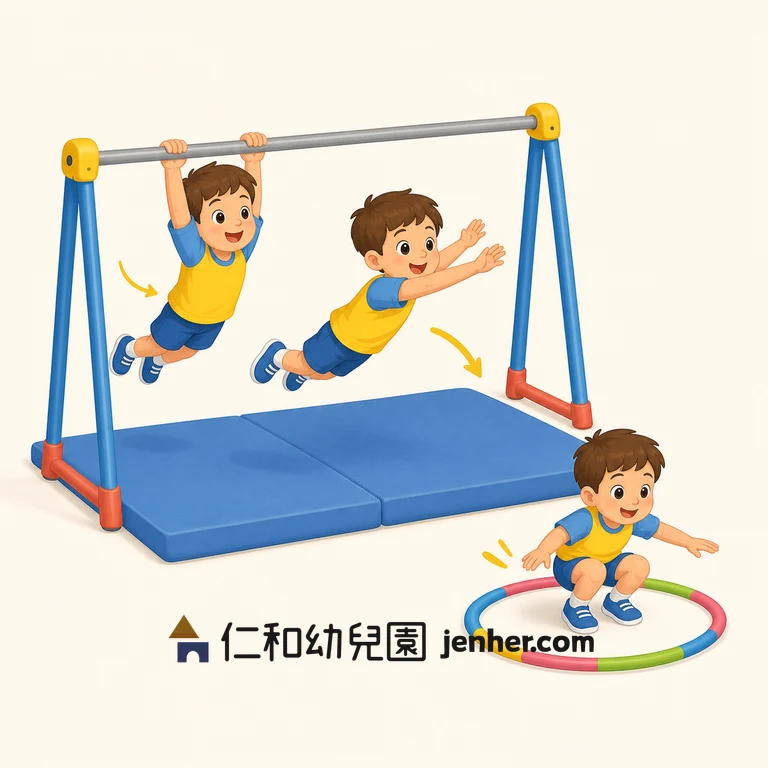
The source shows releasing from a swing into a floor hoop. Modernize it to a small supported weight shift and a controlled return to a landing mat; do not release into a target.

Teacher Notes: Setup, Safety & Variations
Aim: Practice stopping and returning to a predictable landing area without a release challenge.
Equipment: An approved horizontal bar, fitted landing mat, and trained educator; a floor hoop may be used only as a visual boundary after landing.
Setup: Place the mat directly below the approved landing area and keep all people clear. Rehearse a floor step-down before any bar work.
Steps: Use a small supported shift, stop the motion, release only on the educator's cue, bend the knees on the mat, and freeze.
Safety: The illustrated release-to-hoop action is replaced by a controlled mat landing. No jumping, swinging release, target accuracy, or child-led dismount is used.
Make It Easier: Step into a floor hoop from standing and freeze with bent knees.
Make It Harder: Name the landing spot before a supervised controlled release; do not increase the sway.
Teacher Cue: "Stop first, release on the teacher's cue, land on the mat, and freeze."
Activity 12-12: Grounded Foot-to-Ball Transfer

Grounded Foot-to-Ball Transfer

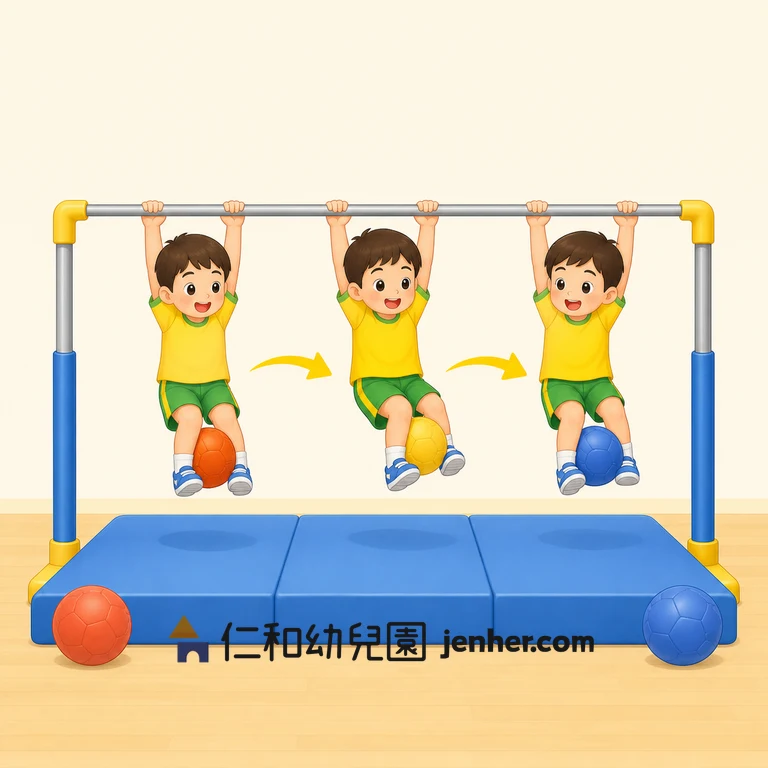
The source shows a child hanging while gripping a ball between the feet. Begin with a seated or lying floor version; an apparatus version is not a general preschool expectation.

Teacher Notes: Setup, Safety & Variations
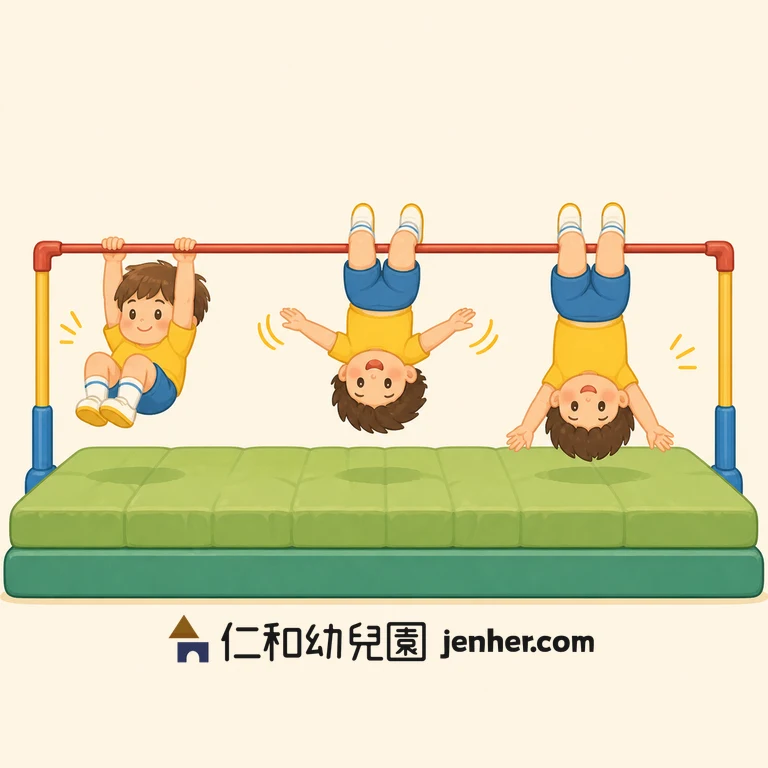
Aim: Coordinate the feet to hold and move a soft object while staying grounded.
Equipment: A soft, lightweight ball and a gymnastics mat; an approved bar and trained specialist are required for any advanced adaptation.
Setup: Use a clear mat. The child stays on the floor for the default activity and places the ball into a nearby floor target.
Steps: Sit or lie on the mat, gently squeeze the ball between the feet, move it to the side, release it into a floor target, and reset.
Safety: Do not combine the ball transfer with a hang unless a trained program has specifically approved it. Never use a hard or heavy ball, and stop if the ball slips toward the face.
Make It Easier: Roll the ball with the feet while seated.
Make It Harder: Move the ball between two wide floor targets without lifting the head or rushing.
Teacher Cue: "Soft ball, grounded body, feet guide, and release into the target."
Activity 12-13: Inverted Shape Observation

Inverted Shape Observation

The source shows both ankles hooked over the bar with the hands released. For preschool settings, use floor-level upside-down shapes or observation; no unsupported inverted hang is taught.

Teacher Notes: Setup, Safety & Variations
Aim: Name and explore changes in body orientation without turning a high-risk inversion into a goal.
Equipment: A gymnastics mat for floor play; a program-approved bar and trained specialist are required for any demonstration.
Setup: Keep the bar area closed unless a specialist lesson is underway. On the floor, give children a clear space and an observe-first choice.
Steps: Try a supported bridge, child’s-pose shape, or feet-up-on-mat shape. A specialist may demonstrate an approved bar skill while children watch from outside the fall area.
Safety: Do not release both hands, hang by the ankles, or attempt an inversion without trained support and equipment-specific policy. Stop for dizziness or discomfort.
Make It Easier: Lie on the back and lift the feet toward the ceiling with hands by the sides.
Make It Harder: Describe whether the body is right-side up or upside down during a floor pose; no bar required.
Teacher Cue: "You may watch. On the floor, keep your neck free and choose a shape that feels steady."
Activity 12-14: Grip-Change Practice

Grip-Change Practice

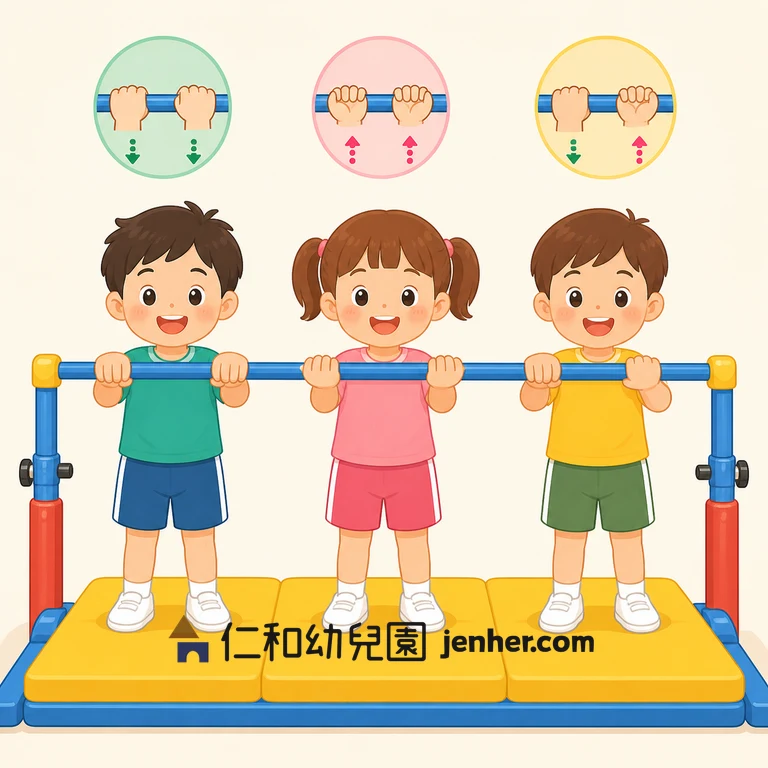
The child practices overhand, underhand, or mixed hand placement on an approved bar while grounded; a brief hang is optional only under the educator's policy.

Teacher Notes: Setup, Safety & Variations
Aim: Notice how hand orientation changes the feel of a stable hold.
Equipment: An approved horizontal bar or low practice bar, with a secure mat if feet may leave the floor.
Setup: The educator demonstrates each grip and keeps the child's feet supported for the first trials. No other child enters the bar space.
Steps: Touch the bar, try an overhand grip, release, try an underhand grip, and compare the two while standing. Only then consider a brief supported hang if approved.
Safety: Do not twist wrists, force a grip, or ask the child to hang until tired. Inspect the bar and mat, and use the child's release signal.
Make It Easier: Practice hand turns with a dowel held by the educator at chest level.
Make It Harder: Name the grip before changing it, keeping the feet grounded and the pace slow.
Teacher Cue: "Hands change, feet stay ready, and release gently."
Frequently Asked Questions

Horizontal Bar Work in Early Childhood — Teacher FAQ

Practical guidance on single-bar terminology, apparatus scope, floor preparation, release cues, and trained supervision.

Is a horizontal bar the same as monkey bars?
No. This chapter refers to a single horizontal bar and its apparatus-specific progressions. Monkey bars, doorway bars, and playground equipment have different design, inspection, surfacing, and supervision requirements and should not be substituted without a qualified program decision.
What bar height should a preschool program use?
There is no universal bar height in these cards. The program and equipment maker determine an appropriate setup based on the installed apparatus, matting, reach, supervision plan, and the individual child. Do not copy the pictured height or install a loose bar at home.
What is a floor-level alternative to hanging?
Use seated grip exploration, floor tuck-and-rock patterns, supported bridges, feet-up shapes, or hand-strength play with a soft object. A child can learn body orientation and communication without leaving the floor.
Are inverted hangs or bar rotations appropriate for routine preschool play?
No. Ankle hooks, inverted hangs, forward rotations, backward rotations, and release skills are advanced apparatus work. They require trained instruction, inspected equipment, suitable mats, an explicit exit plan, and program approval; observation and floor alternatives are valid participation.
When should an educator end a bar activity?
End the turn before grip fatigue, skin pain, dizziness, fear, loss of body control, or a missed release cue. Return to the floor, offer a rest or observation choice, and never extend a hang to complete a game or repetition target.
ADVERTISEMENT